Week 1
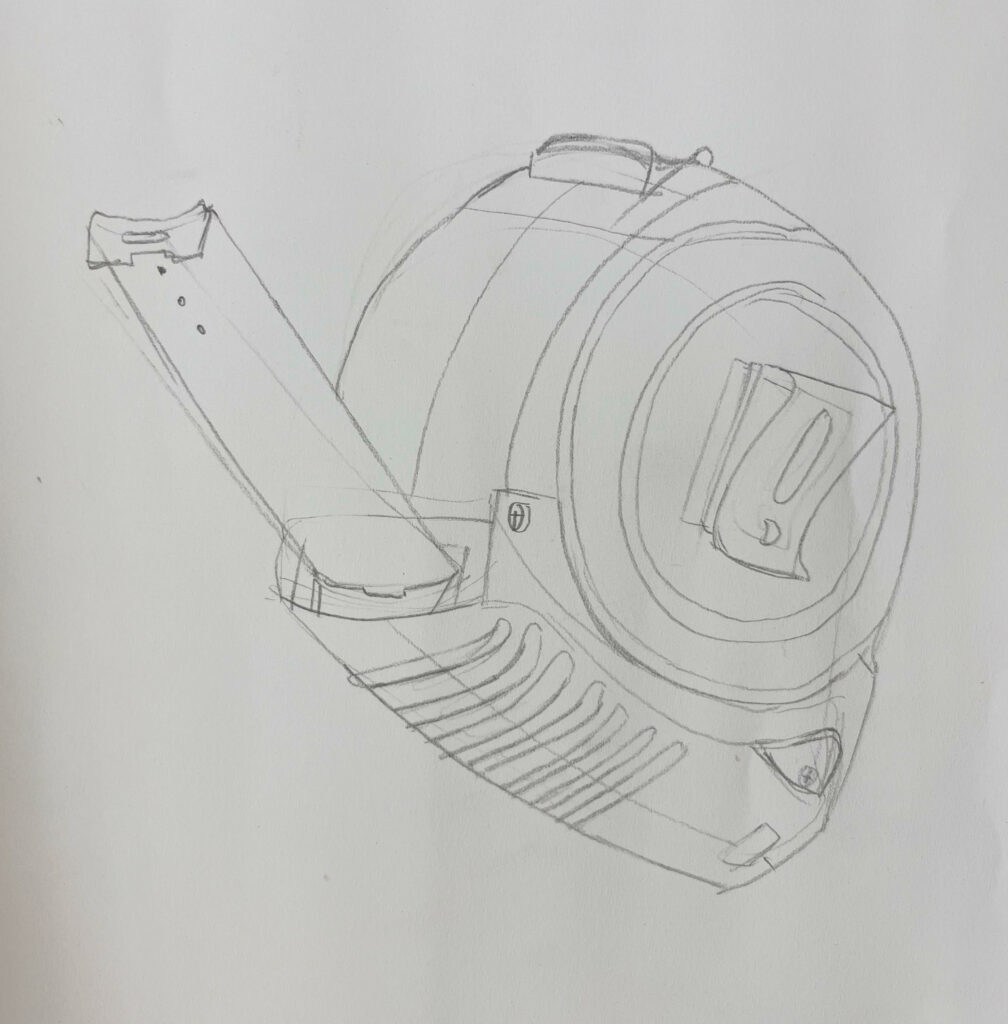
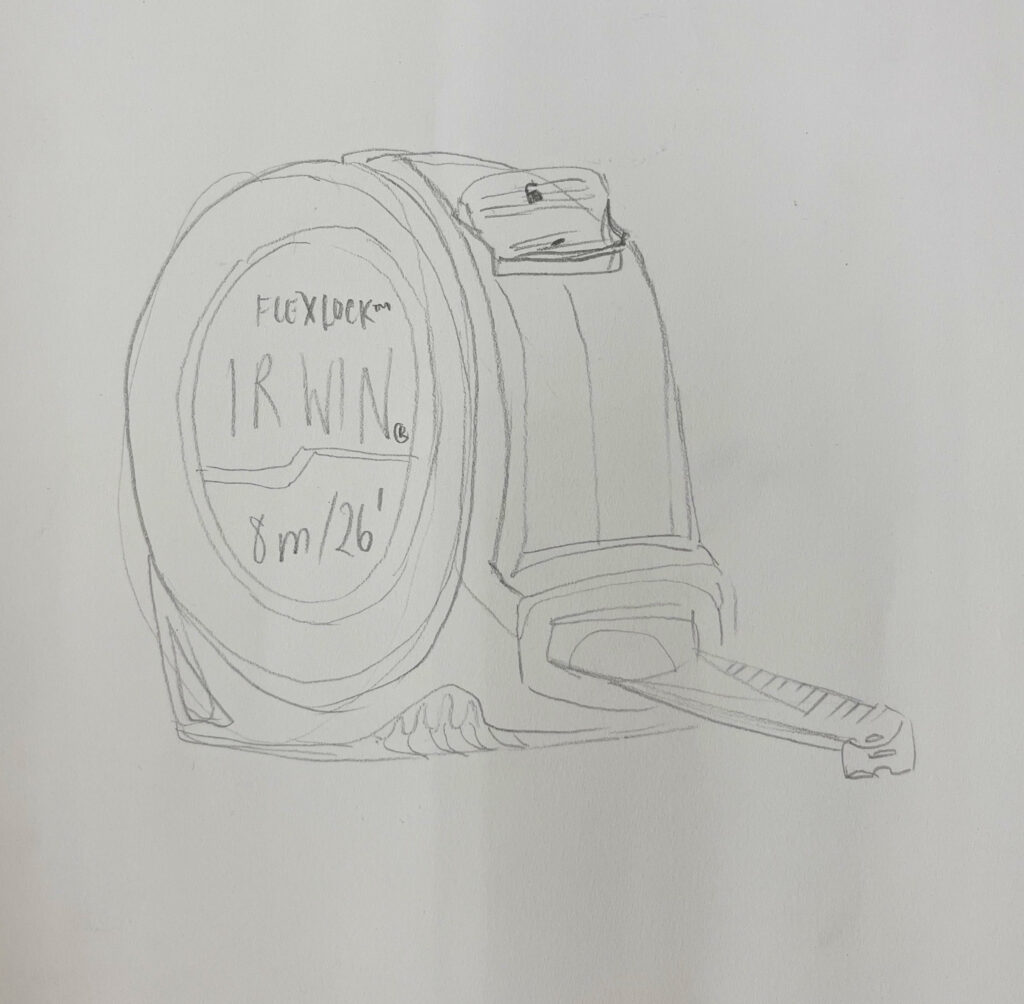
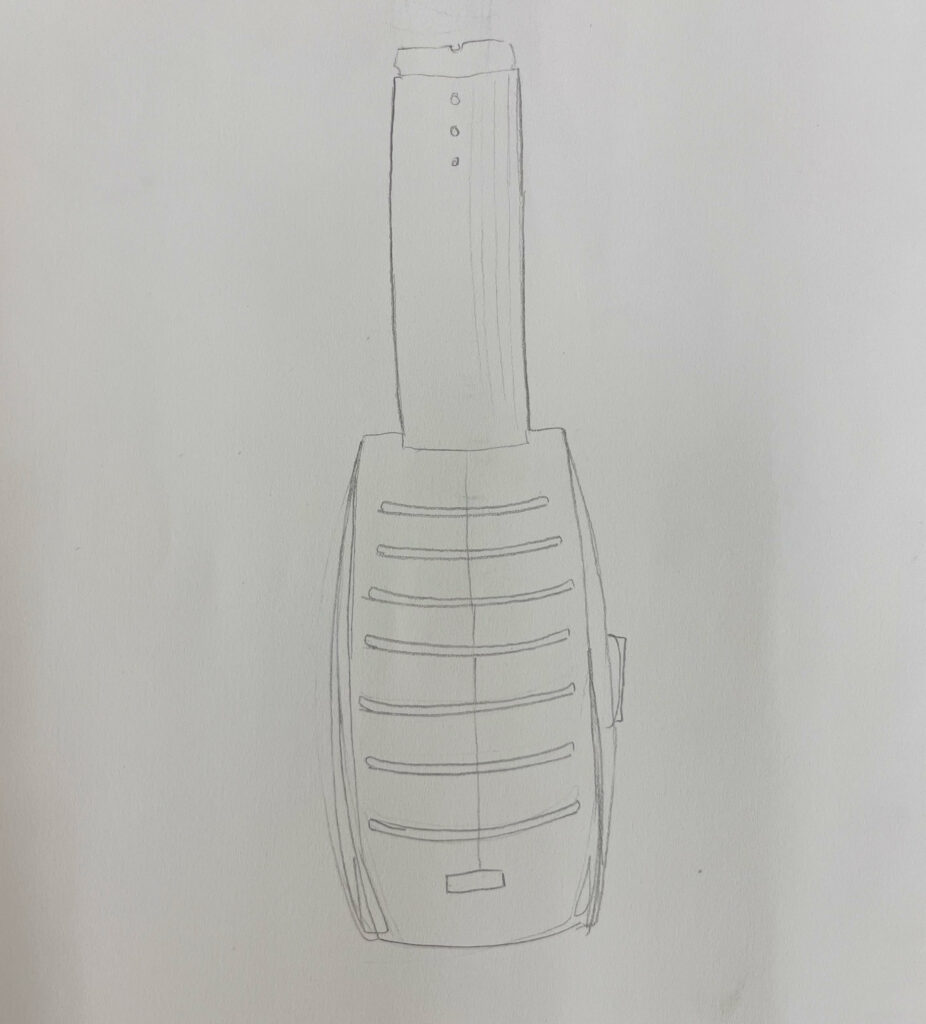
Without much instruction, but lots of examples, we got right to work creating our 3D wire object in class. First, we were assigned to draw the image to get familar with it. By bringing the 3D object into a 2D form, then back to 3D, we could get a better understanding of the object.
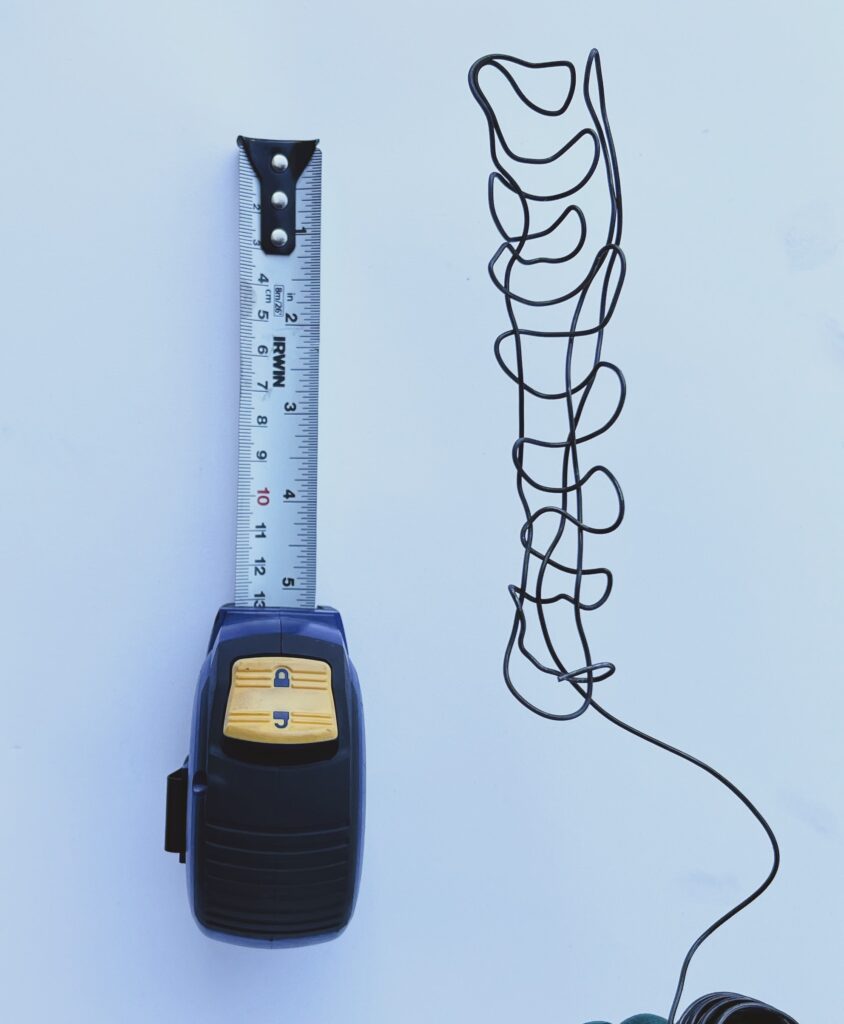
Drawing the measuring tape certainly did help me become more intimate with the object. I don’t think I have ever looked so closely at a measuring tape. It gained a newfound respect for this tool I’ve used many times. The instructor seemed impressed that one measuring tape could contain 29 feet. She noted that the building we were in was only 100 ft. long. In other words, nearly a third of length of the school was contained in one small container. She was right. That was impressive! The question was, how best to represent this quality of the measuring tape in the wire project.


After spending a considerable amount of time drawing, it was time to begin practicing with the wire. When I did, I naturally approached it by creating two 2D shapes (the sides of the measuring tape container) and then connect them together with the 18 gauge wire making the object 3D. Working with this new material proved to be challenging and the wire did not seem to be co-operating. It was difficult to get straight lines with very little technical skill.
After receiving from feedback from the teacher, I decided to take a different approach by making switch back wire lines and then weaving them together to create the tape portion of the measuring tape. This definitely provided more structure that the 2D shapes, but it still did not create the clean lines that I was looking for. Naturally, I blamed the problem on the wire, instead of my own ignorance. Shortly after reflecting on this in our debriefs at the end of the day, I looked back to see a classmate pulling on the wire to make a straight line. I remembered that she shared she had worked with wire before and realized that maybe the problem was not the wire, but my lack of knowledge and skill. This was what was leading to more “wobbly” looking shapes, not the gauge of the wire.
That night, I went home and sat with my frustration from the project. The project felt challenging and had brought me against an edge. Fortunately, edges are where growth emerges. So, instead of letting my discontent grow, I searched for ways I might alter my approach. I began to wonder if instead of fighting to make the wire straight, I needed to make the wires more curved. So, I thought of coiling the wire into a flat circular shape to make the sides of the measuring tape casing. I would try that at my next opportunity.
I also reflected on the structure of the class that day. We didn’t receive any technical training on how to work with the wire, only examples of different artists and students. I wondered if the real assignment was not to make a perfect and beautiful 3D object from 18 gauge wire, but instead to creatively problem solve and produce a decent finished project. At this point, a decent finished project seemed like the best I could hope for.
What if instead of the superficial outcome of a beautiful 3D object, the goal was actually to find joy of the experience of creating. Isn’t that one of life’s greatest goals? Experience a problem, challenge, or edge and remain completely in love with the exploration of the task at hand. To be curious to different approaches and techniques. To ask questions, look at what others may be doing, reflect, and perhaps most importantly to observe where I may be getting in my own way. This seemed like the deeper intention of the project. One that excited me a lot more than producing a metal measuring tape.
The next opportunity I had to try my coil idea was a few days later and I pulled out my wire and went for it. The tighter I rolled the coil the more it seemed to stay in the shape that I place it. The more loose the coils, the more likely they were to move in different space and direction.
Unfortunately, once the coil became a certain size, it was difficult to use the pliers, so at that point, I switched to curving the wire with my hands. It looked like my hands produced a looser and less consistent wire. However, when I attempting to do the same on other side of the measuring tape, I was able to find a way to continue using the pliers for the entire coil. This is seemed to create a more tightly contained circular coil. But, when I laid the two coils next to each other, they seemed almost exactly the same. I wonder what other ways in life I delude myself into thinking that one approach is better than another when in reality they produce the same results.
I decided to try and flatten the some of the outer coils to create the bottom or underside of the measuring tape, giving it a flatter surface to stand on. I’m not sure if I like the outcome because the wires now seem too close in those areas where I flatted the wire. If I planned to do this before I finished cutting the wire, I may have left a larger diameter of the larges outer coils to avoid the smooshed appearance. As usual, hindsight is 20-20.

I had one really great idea to utilize, a cone shape to create the coils and wrap the wire tightly around the cone. However, I do not have a cone of the correct shape. This made me wonder how much the success of an artist is contingent on having the right tools.
Whether that is true or not, I still felt like I was missing some important technical knowledge on how to work with wire. I wonder if I did more research on the material that I am working with that I could discover new techniques and approaches to try and create the outcome that I desired. This feels much more left brained; analytical structured, researched, calculated. Why do I feel resistance towards that approach? Is it because so much of my life feels structured? Am I waiting for permission to be more right brained? Is there not a middle way?
I wonder how much we do that in society: create an outcome and then struggle to find a process that will help us deliver on an outcome, instead of having a specific process and then become completely emerged in the process. I wonder what the benefits and drawbacks are of each approach. I definitely have a lot of experience with starting with a desired outcome and then searching for the right approach, but not as much experience with being completed emerged in process with little need for a specific outcome. Perhaps that is what art is about for many people: an opportunity to play around with the materials until an artwork emerges. I imagine it might be for some, but definitely not for all.
Next I’ll try watching YouTube video for technical training on working with wire.
Week 2
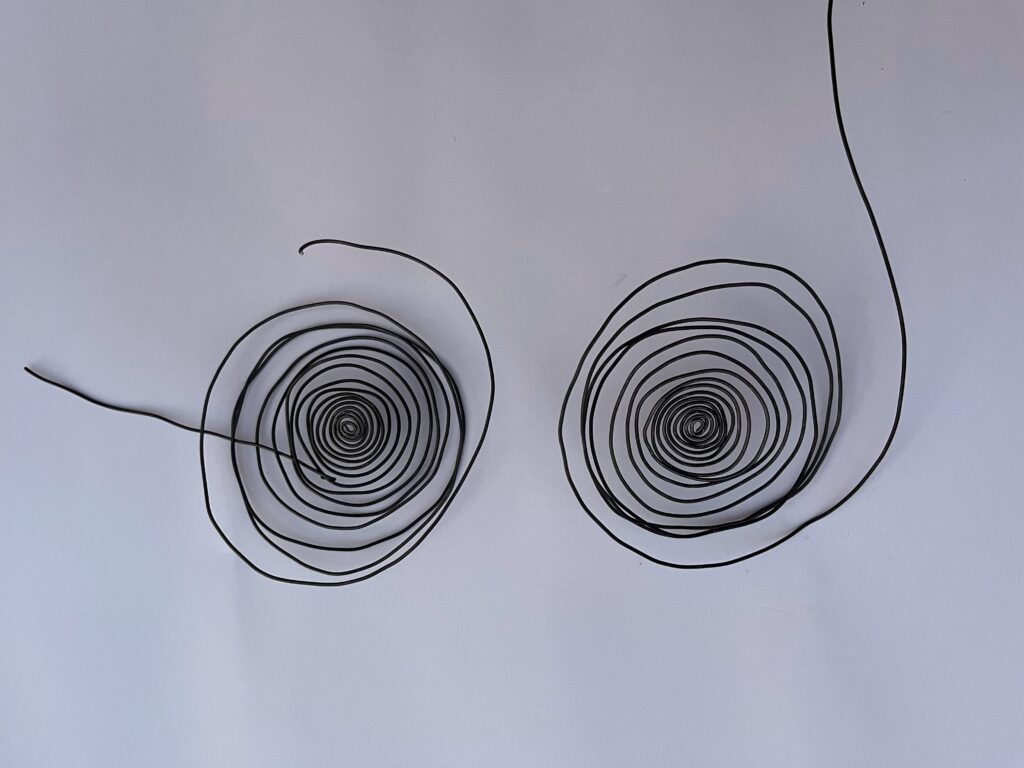
Week 2 started off with an incredible discovery. As I was going to put out my recycling on the street curb, I noticed a golden metal wire in the bin from an old note book that I had pulled apart to recycle. The piece was perfect for the “tape” part of the measuring tape! I pulled it out of the bin and studied the gauge and shape and made a few small adjustments to open the rings so they created more of a U shape similar to the measuring tape.
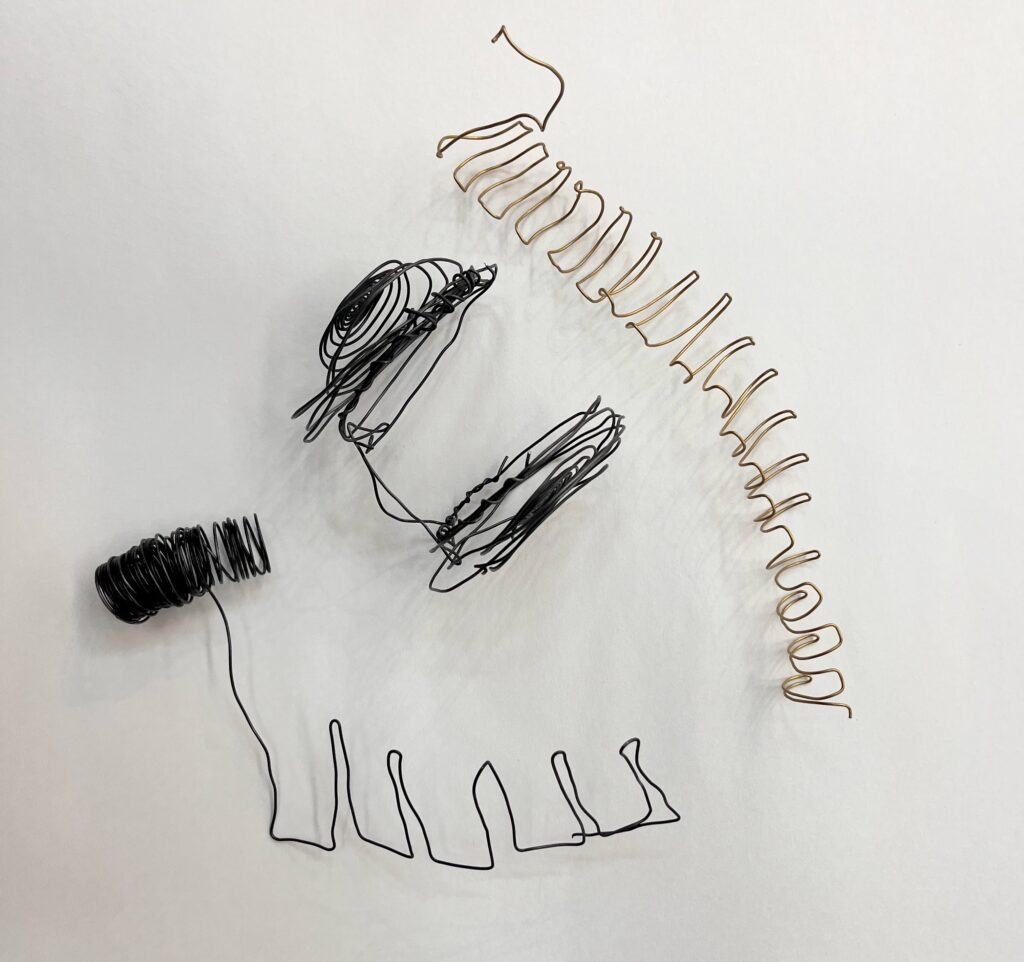
Now, I needed a way to connect the two ends end of the outer casing of the wire together, so I used the 2D line object from week 1. This left an “open shell” look to the measuring tape, but at least it now had structure. I decided to use the same pattern from the found golden binder wire in the image above, for the to complete the casing of the measuring tape. This was the first time in the piece where I was adjoining more than one piece together. I found it challenging, but looked to examples in the room for how others approached this. I noticed that coiling one wire around another seemed to provide significant structure. So I gave that a trie and it held well! I enjoyed the look of one wire coiled around the other. The curvature gave it a wild yet methodic look.
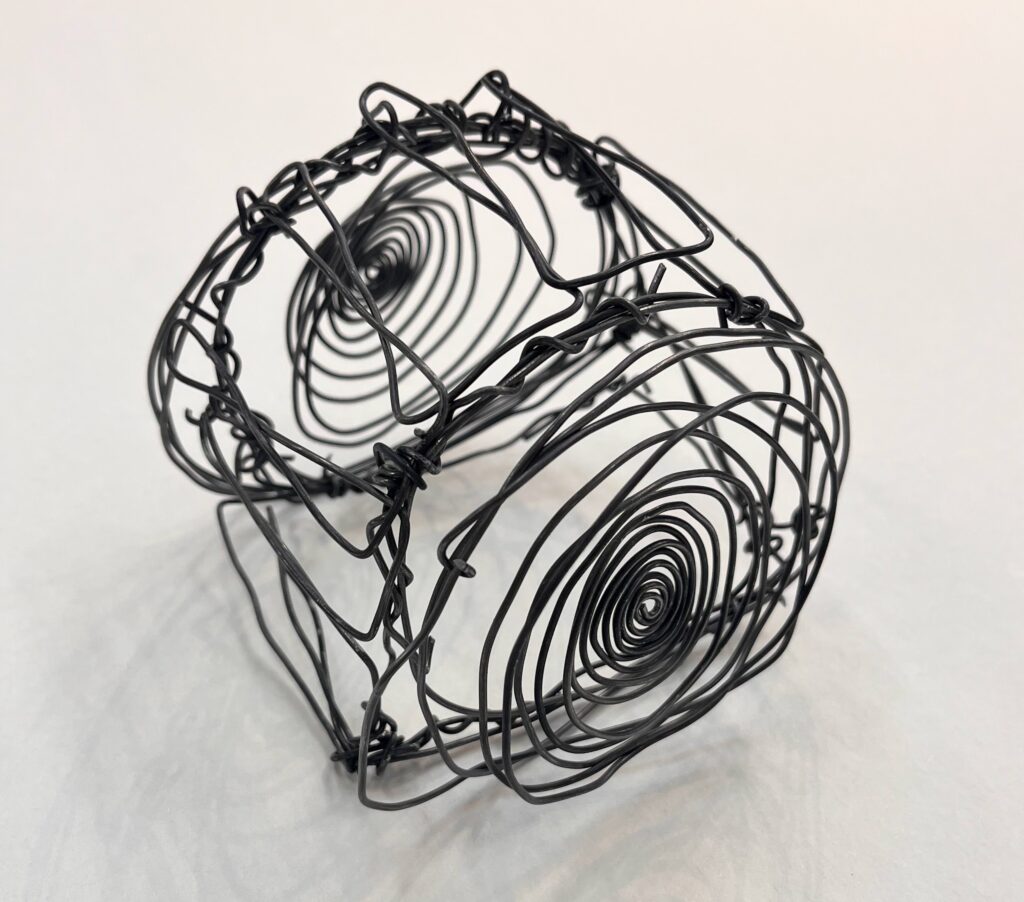
Perfect! Now I had my enclosed casing and the curvature on the sides and along the top of the casing repeated the pattern of the measuring tape to create consistency. The spirals on the side mimic the movement of the tape as it is spiralled and stored within the casing. Now, to attach the golden tape!
As a final touch I wanted to add the button on top of the measuring tape. This felt important to me because this is the apparatus that allows for the tape to enter or release from the casing. I wanted to to be able to move slightly to mimic the true object. I decided to leave the bottom of the measuring tape open. The reason is because there is already a lot going on in the shape and I didn’t want the bottom to detract from the coils on the sides, the tape, or the button on top. Plus the structure seemed to stand sturdy without a bottom side to the casing so I thought I wouldn’t test my luck by adding more material that might destabilize the object when sitting upright.
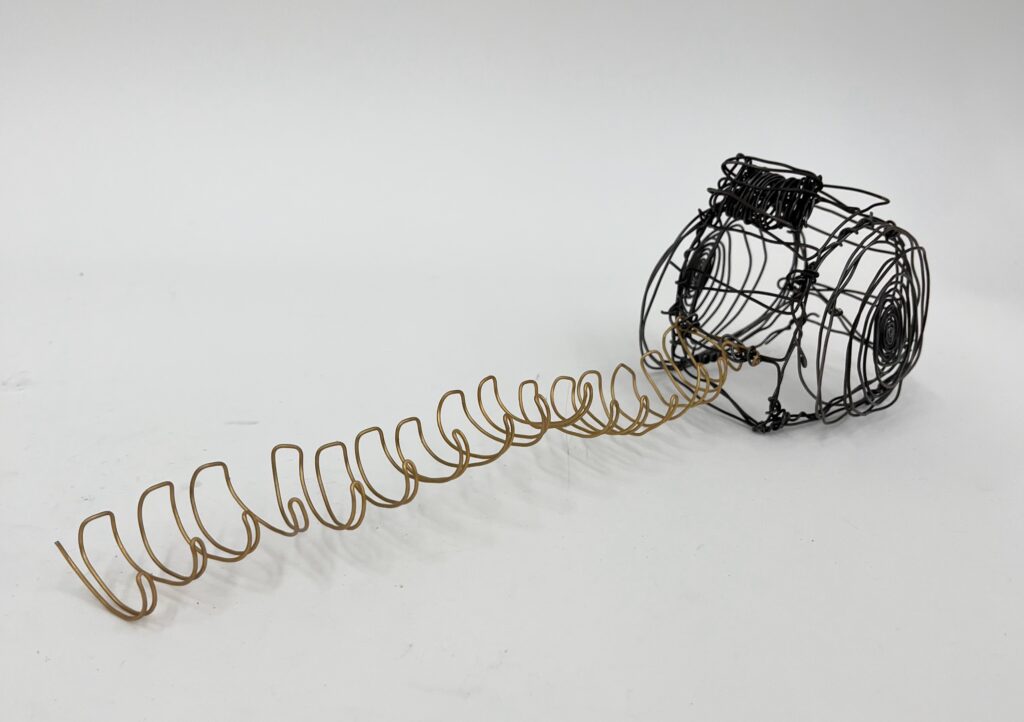
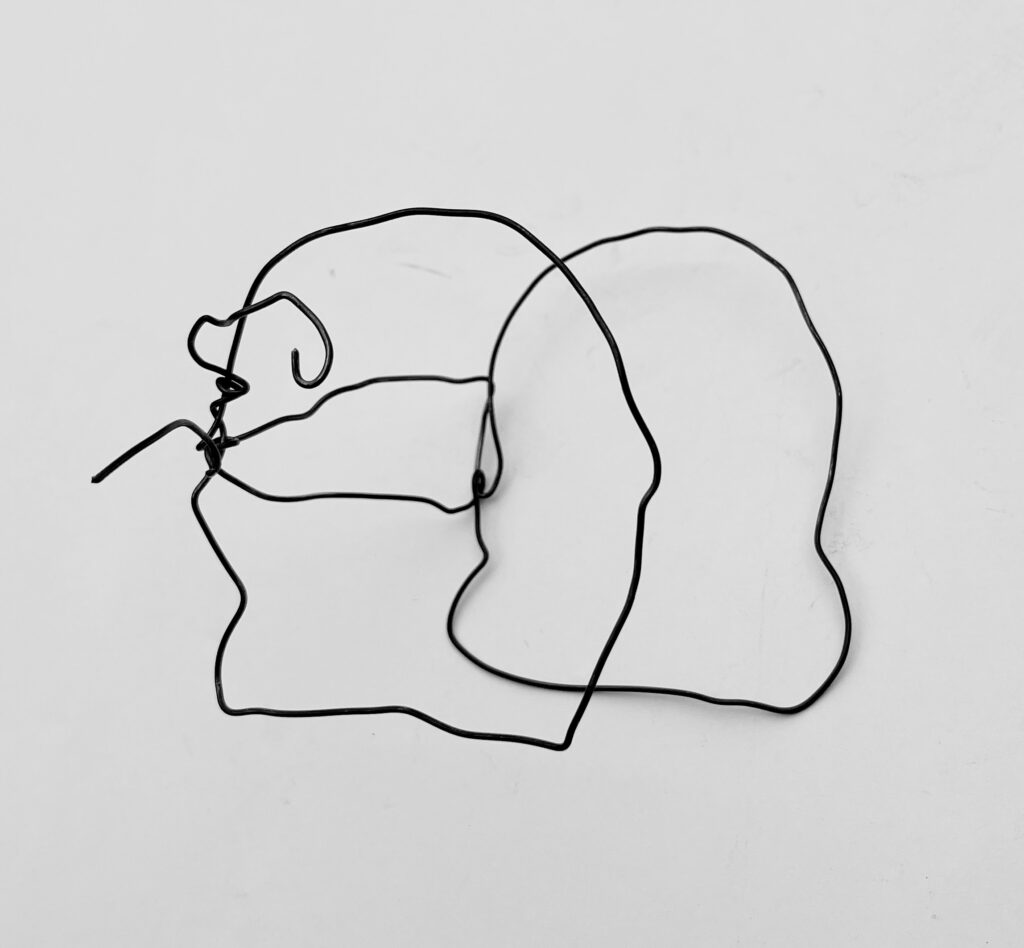
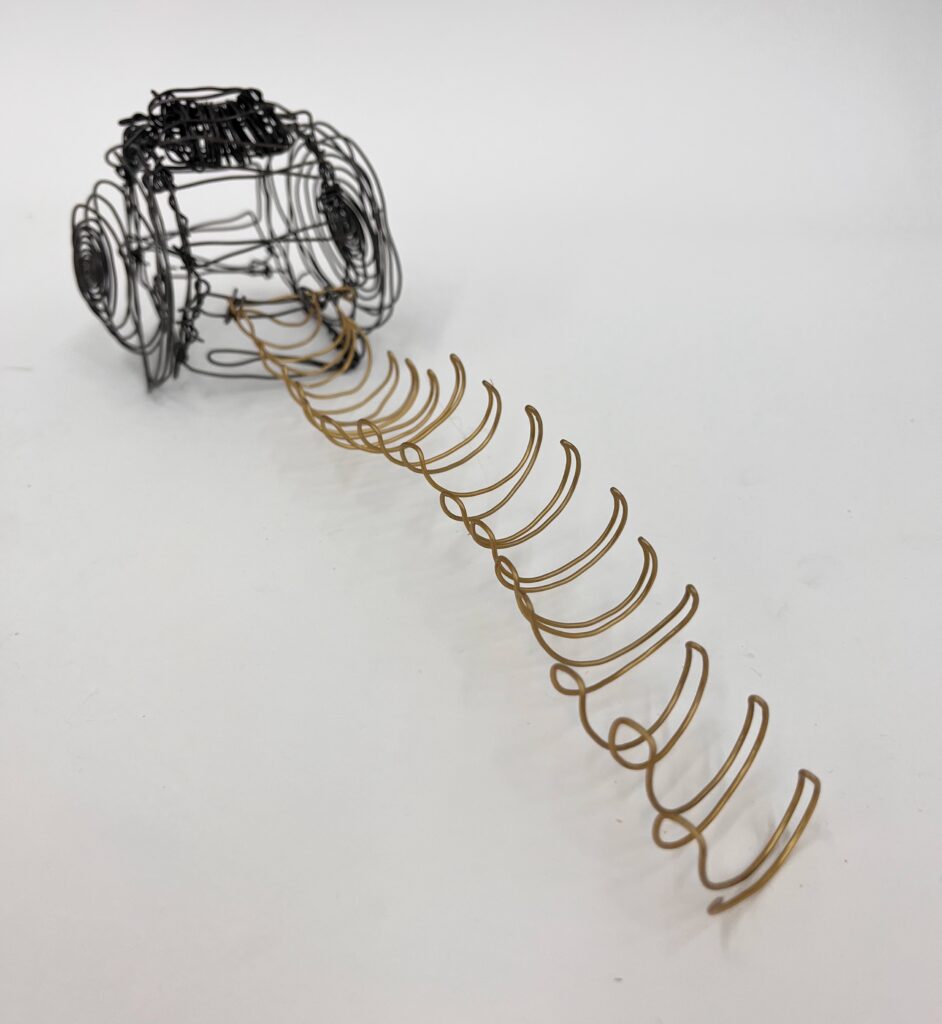
And there you have it! The final piece. I considered spray painting the piece so it was all one colour, but I decided to leave the tape portion gold to draw attention to the length of the tape since that was a key element of the piece. I love the way the long tape has a bit of a mind of it’s own, which is similar to how the measuring tape works when it’s long and extended. When I look at it, I also see the face of a fly with its long tongue and big eyes. Perhaps that will be a future iteration of this piece! I also really enjoy how wily and organic it looks. At the start of the project I was worried about the wire and it’s non co-operative nature and how that might work against the straight rigid lines of the mechanical object. In the end though, I think the squiggly lines of the pre-coiled wire gives it charm and makes it look more alive and more interesting.
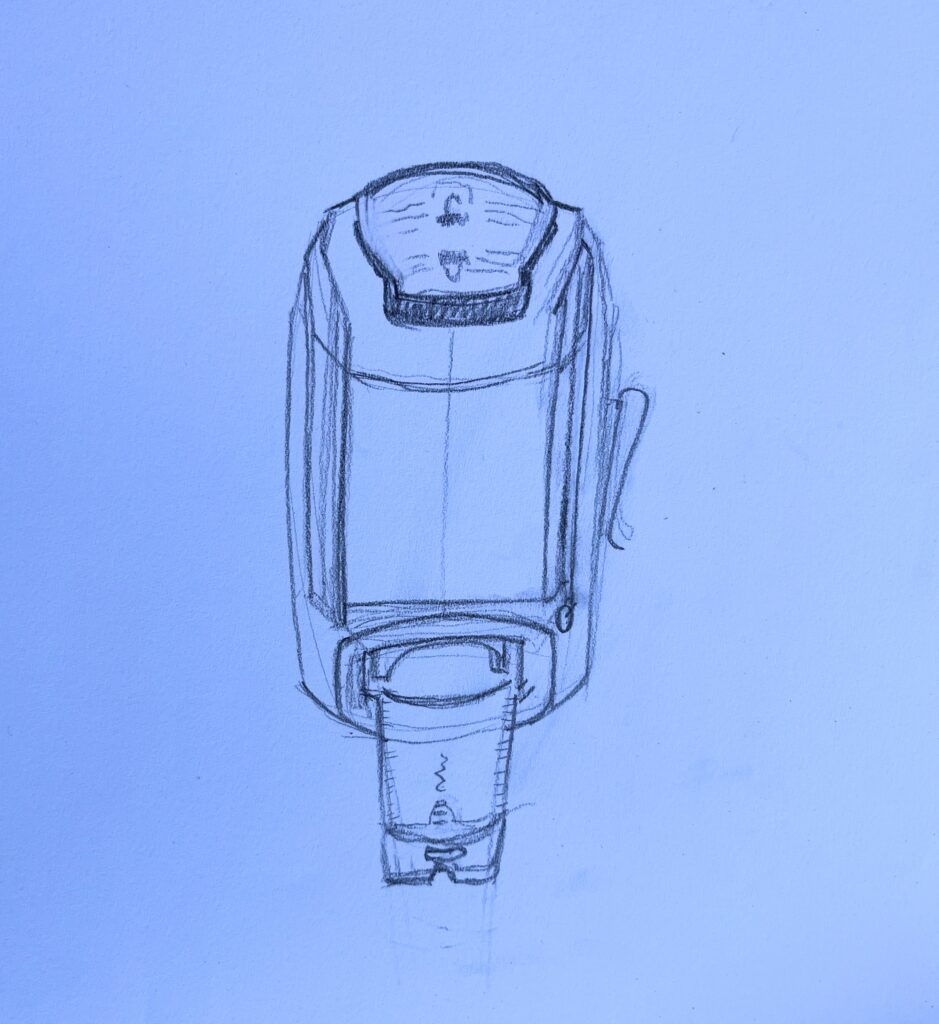
I also completed my sketch drawing of the object after completing the artwork. I understand that may not have been the intention of the drawing but I noticed when I drew these new renditions my hand felt freer. Perhaps because I had already been studying the object for so long, the pencil flowed more confidently across the page.
UNIT 1 Research Assignment: 3D Line Applications in Art + Design
Google Slides: https://docs.google.com/presentation/d/1hN8kqcfHukLQT8Tz8eRN2BYTH3KjYRSDpUAFBUNsM9k/edit?usp=sharing
FIN-130_U1_Research-Assign_2024Wire Heart Process Blog
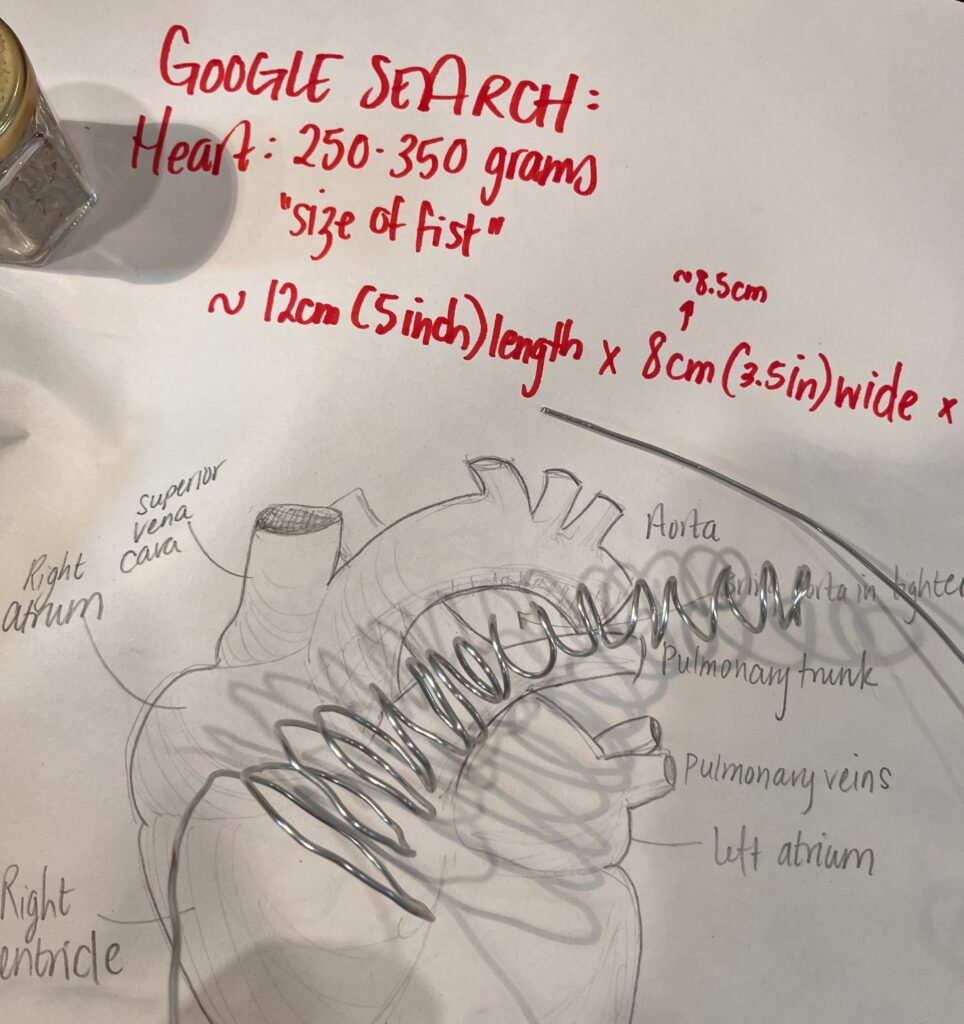
My project began with research on the heart. I started with looking at images online after googling “anatomical heart”. I made a rough sketch of the heart to get an idea for the shape and major arteries that make the form of the heart. Then I researched the dimensions. I looked at a couple of applications that Angela recommended, but there wasn’t anything on there for the heart. I also signed out the book in the library she recommended, but there was only one image in the book of the heart and it was not a very detailed image (albeit it was beautiful should all of the capillaries surrounding the heart in different colours).
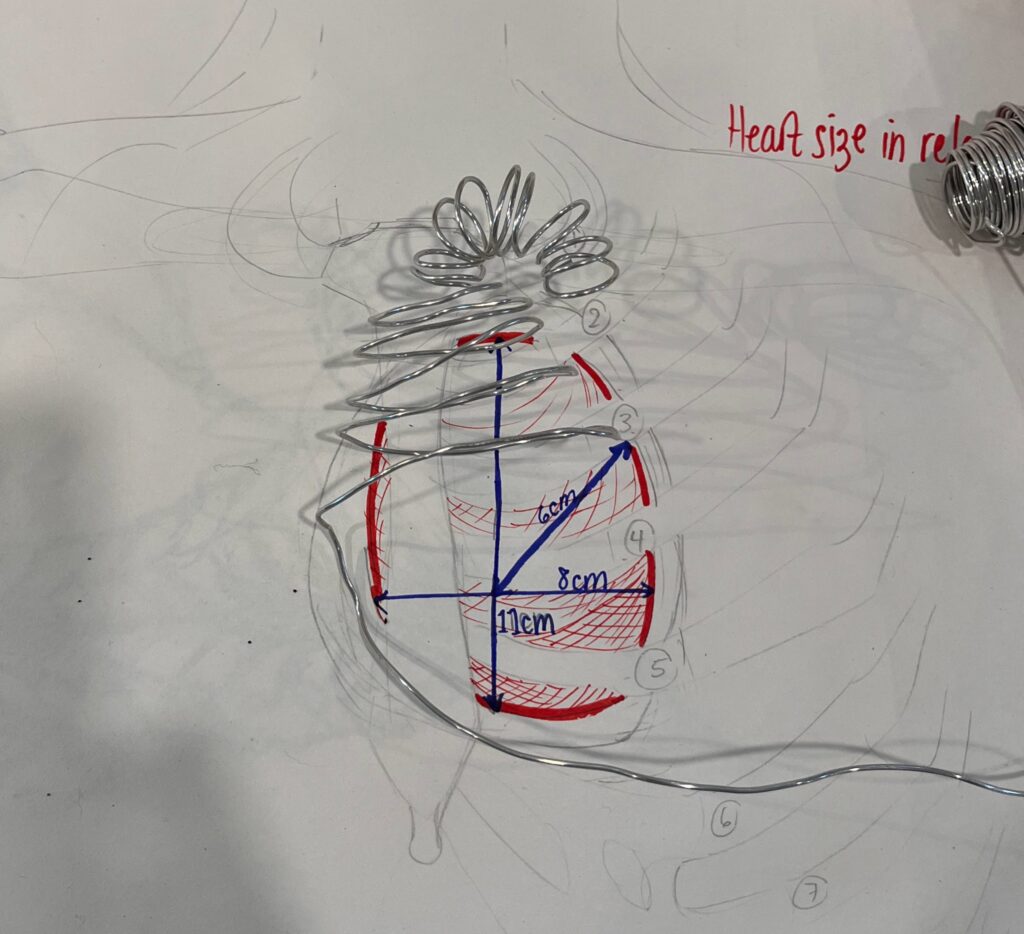
After doing the research of the shape and size I decided to see how that would relate to the space within the rib cage. This lead to me drawing out the heart size in relation to the rib cage (see third image below) as well as looking at the skeleton in the class to get an idea of the space within the chest. One website said that the heart is roughly the size of a fist, and that became a good reference as I build my structure. You can also see in the third picture, that I numbered the ribs so I could get an idea where behind the rips the heart lays. You can see that its partly hidden by the sternum. This is when I spoke to Shaylin who was working on the chest, I wanted to see if she could leave the chest partially open to make space for the heart to appear to be emerging for the chest. She said she could probably do that and then we discussed the idea of the heart being passed to the other skeleton, since there would be only one heart, but two skeletons. This could mean that the heart is in the hand and could also mean that the size of the hear didn’t matter as much. I decided I’d speak to the morning class to see if they liked this concept as well.
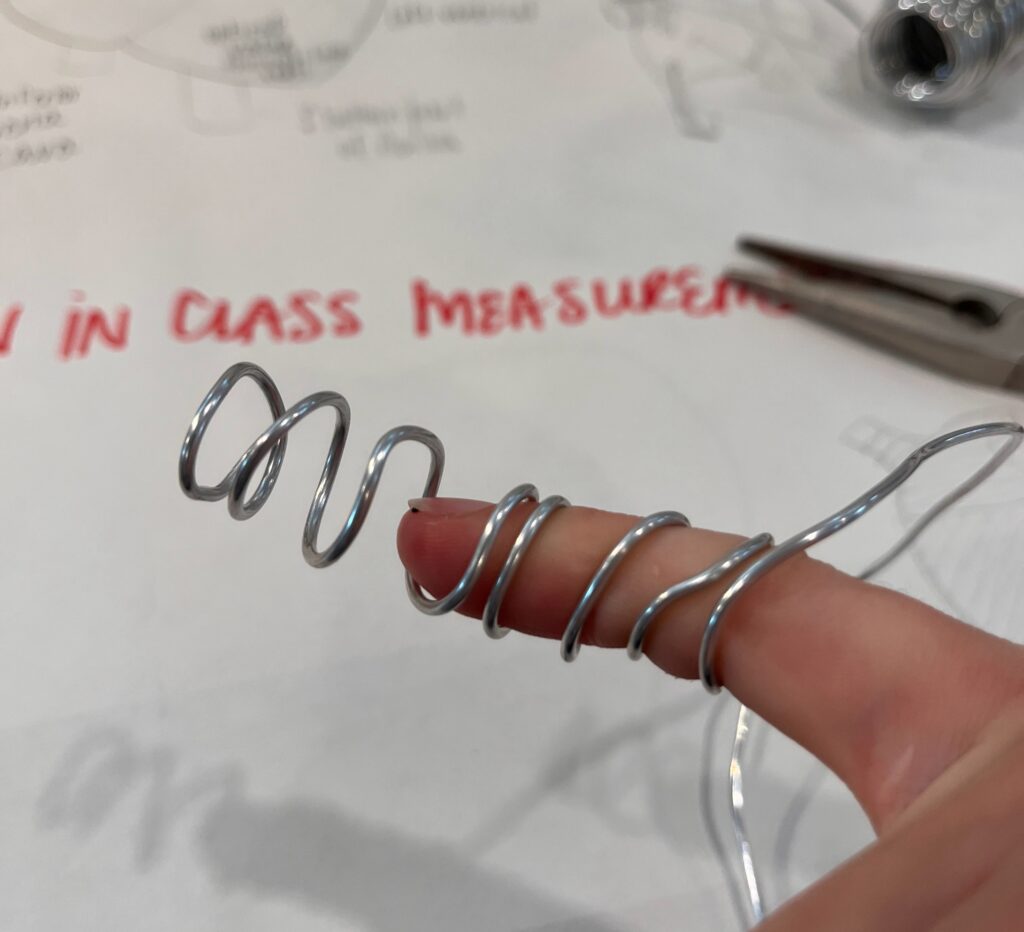
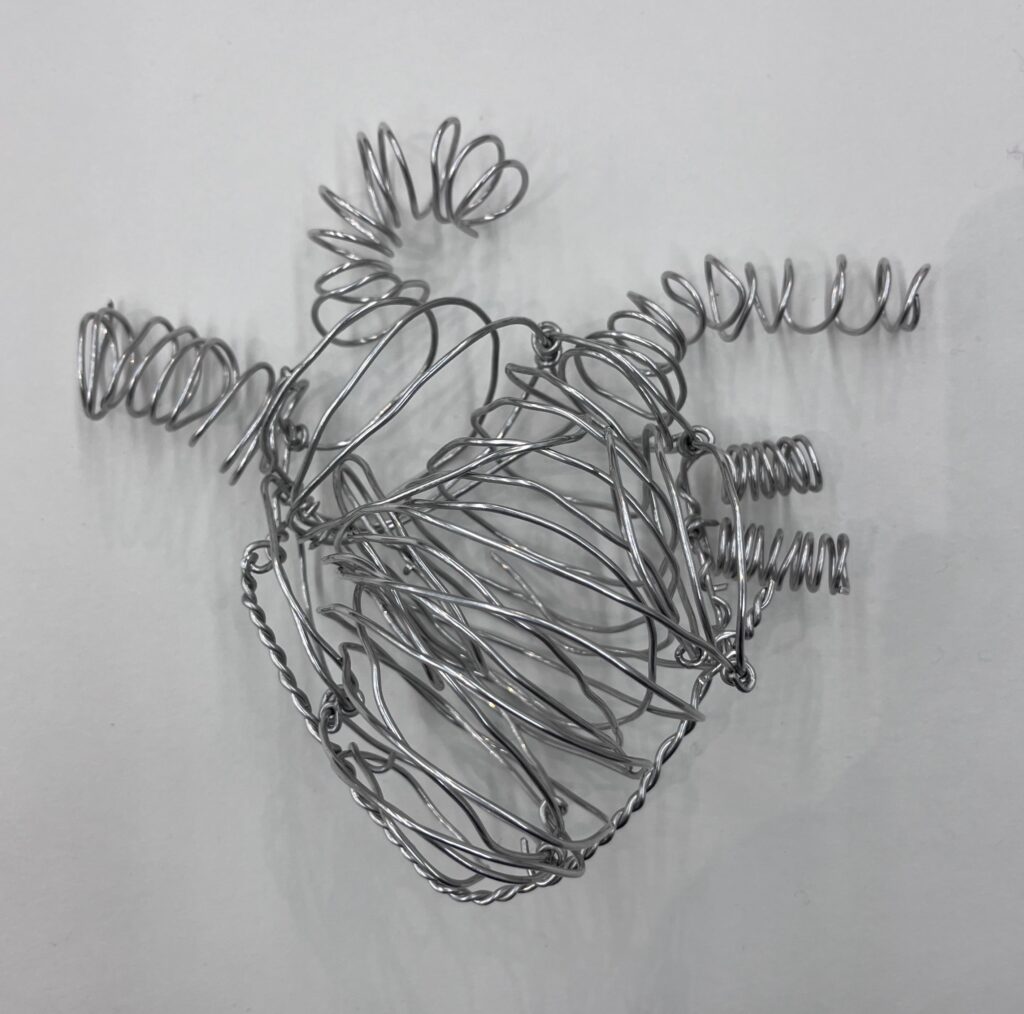
After investigated the form, size, and the placement, I began to play with the wire material and quickly found that it was much more malleable and forgiving than the last project. I enjoyed curling it around my finger and reflected on how visually stimulating the circular shapes were from my last wire project and decided to see if I could work with this shape throughout the entire piece. So I went with it. You can see I started with the shape of the Aorta and then began to widen into the rest of the heart shape. Unfortunately, this where I started to run into a challenge. The circles became larger and well, the heart isn’t exactly a circular shape. After struggling with this for a while, until I kept with my original idea but worked to make them into circles of different shape and direction in the quadrants of the ventricles of the heart.
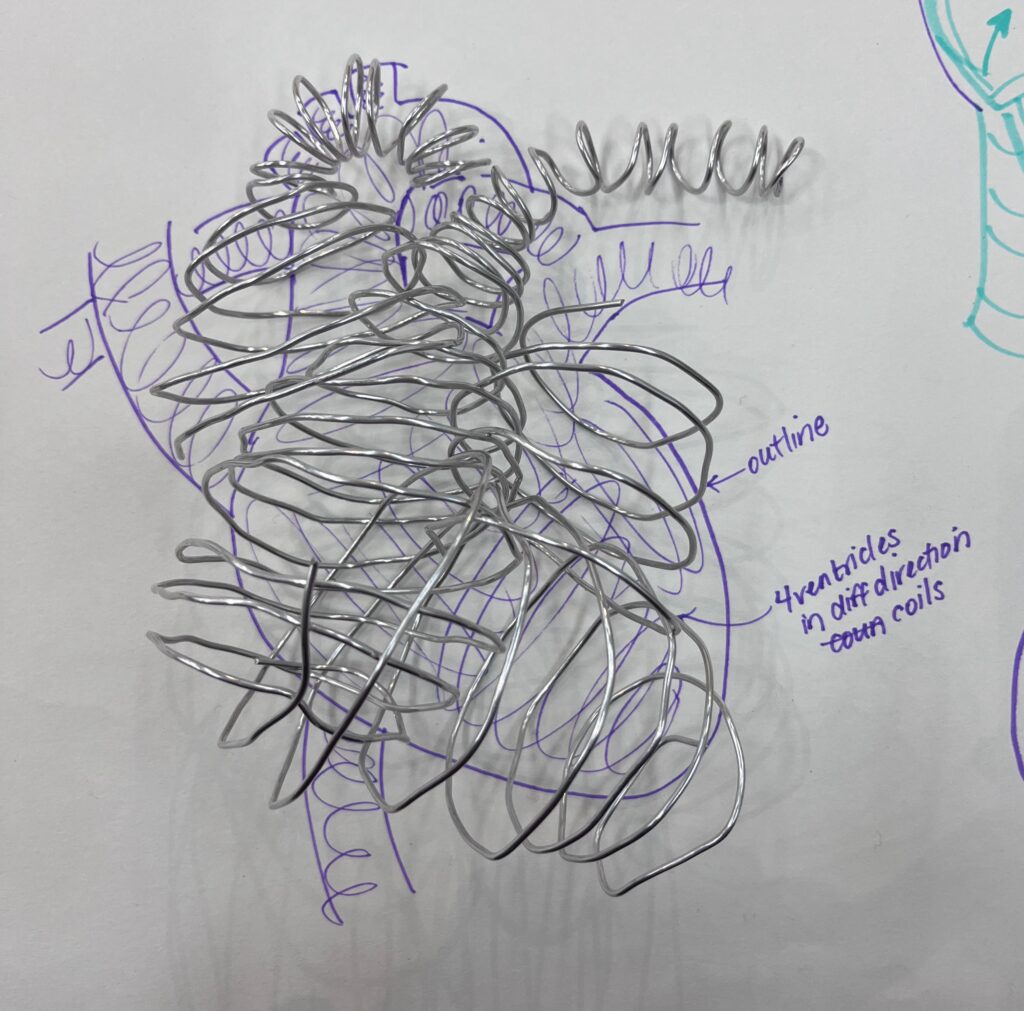
And this is what I got. It was messy. and I didn’t like it. It needed something to hold it together, both physically and with form. This is when I thought of David Olivera from my research project and wondered if I could create an outline, like a drawing and make the shape of the heart more clear as well.

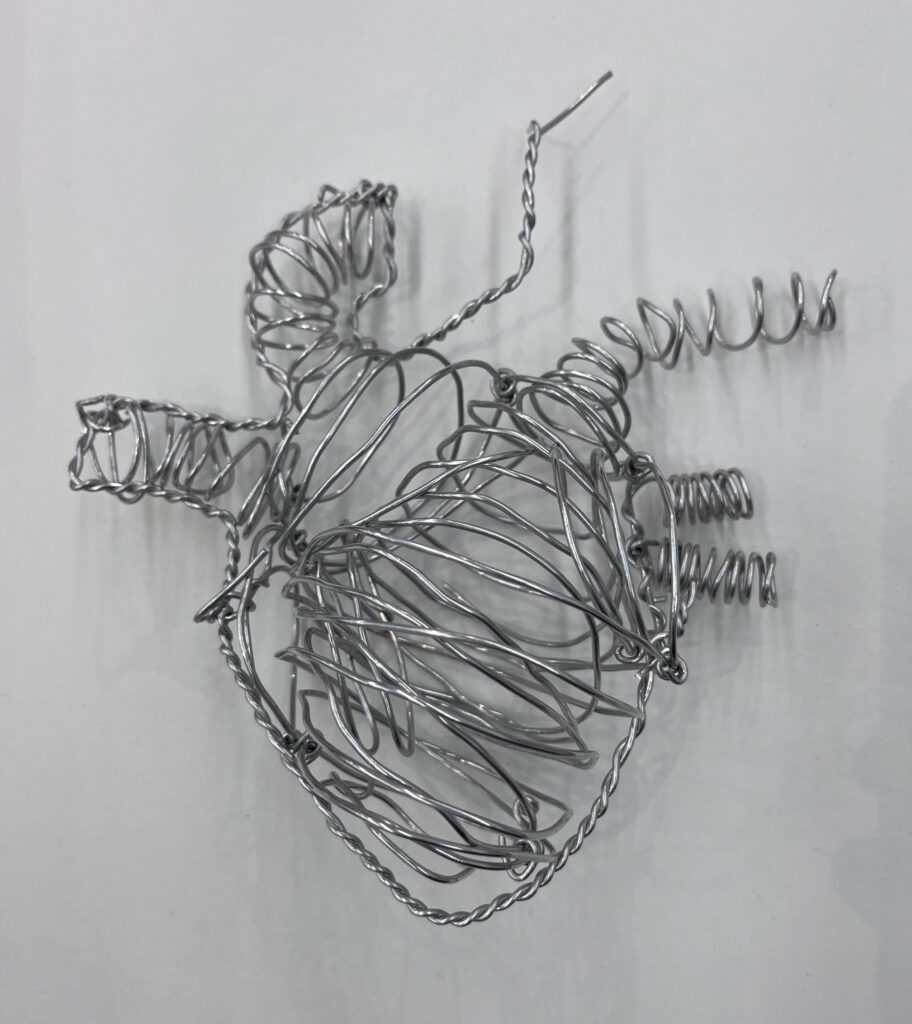
So I went with it. And unfortunately, it didn’t really work on my first try, the wire was too thin and flexible and the the ventricles kept bouncing out – literally. So I started by creating some binding between the ventricles to hold them in place, then moved to strengthening the outline of the heart by twisting them together. This was effective! And so the outlining began.
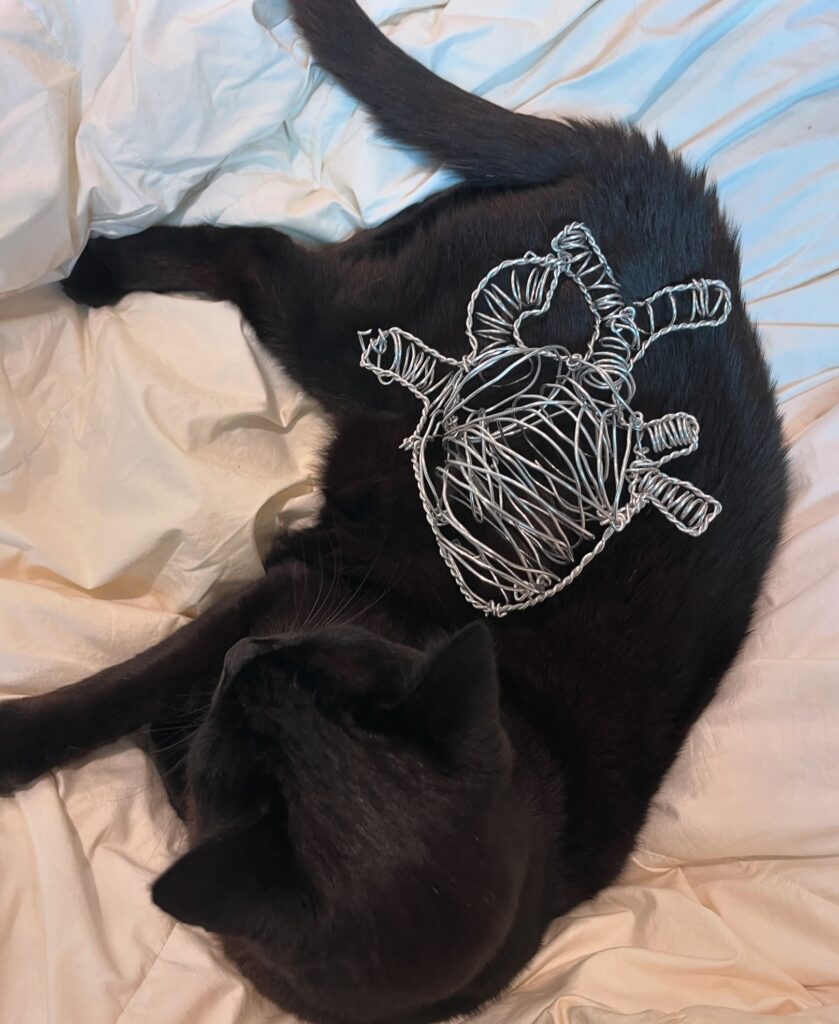

I have to admit though, I did have a helper during this process, a very snuggly therapy kitty who doubles as a great back drop. After bringing the hear to class and placing it in the hand and the chest, I decided to add this coloured small wire, again drawing inspiration from Oliveira and also my other classmates to incorporated smaller wire, I made the colouring and gave it that pop! I love it 🙂
Post Presentation Reflection
What common threads or techniques emerged across the group: It seems like in the presentation more students caught onto the spiral technique to try and make a sense of volume.
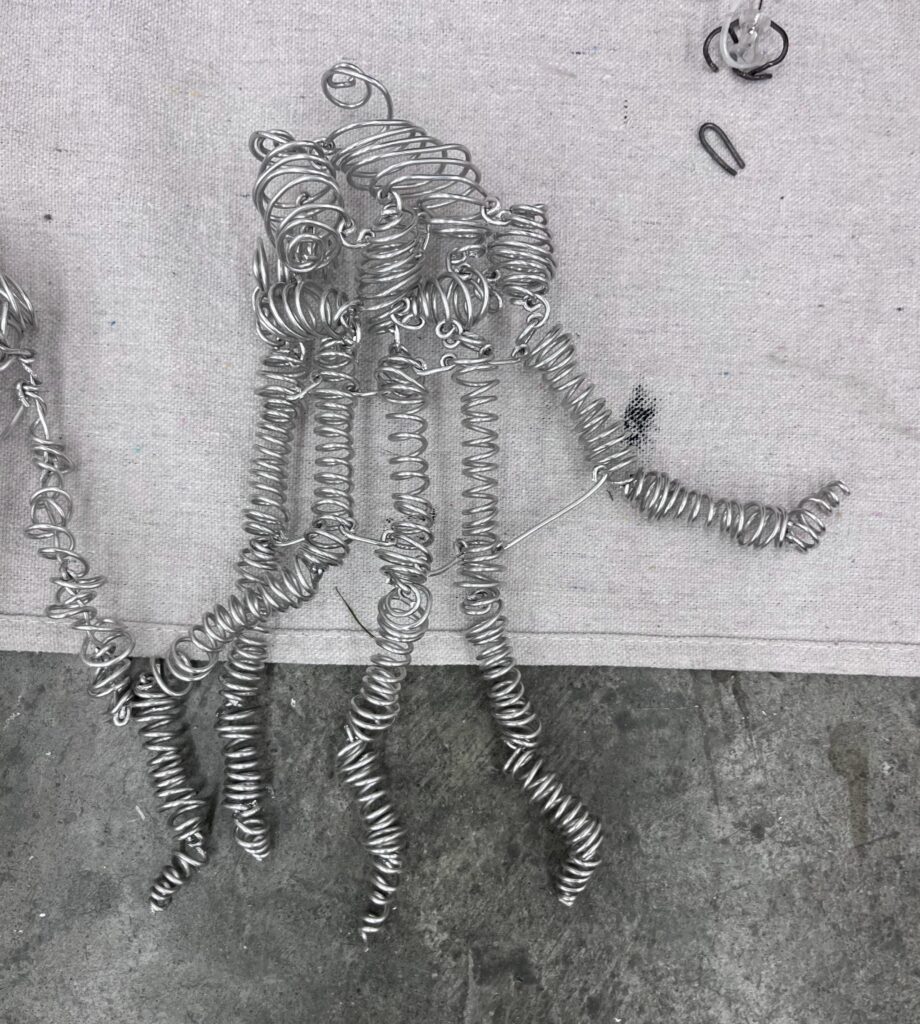
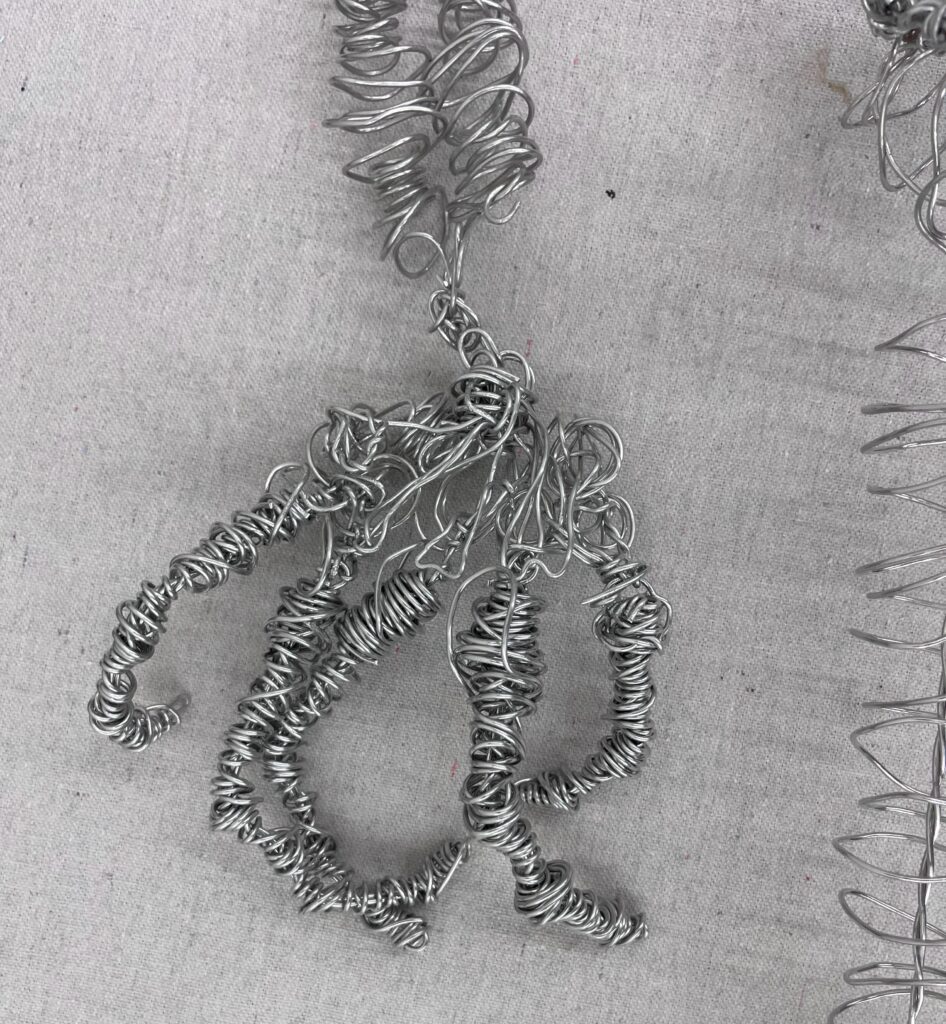
What unique solutions stood out: These three pieces stood out to me but each of them for different reasons. The hand incorporated more movement and implied lines with the spiral edges of the fingers. It gave it a sense of gesture, like the sculpture was reaching out. The spiral at the centre also gave it a story and movement. Something is happening here!
The Skull is craftfull designed. I’m impressed by the structural lines mixed with the lines that fill in the space. Everything seems so carefully thought out and spaced. Then the circles in the centre draw the eye in… literally.
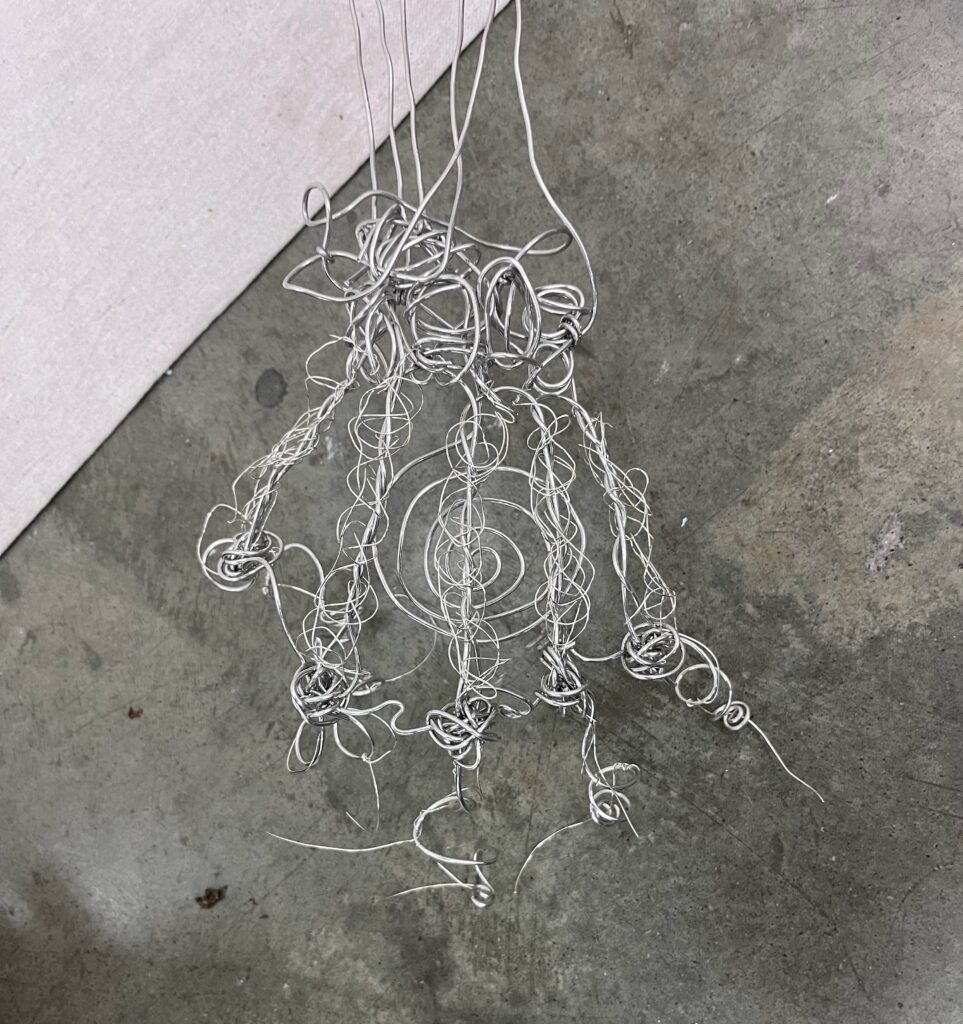
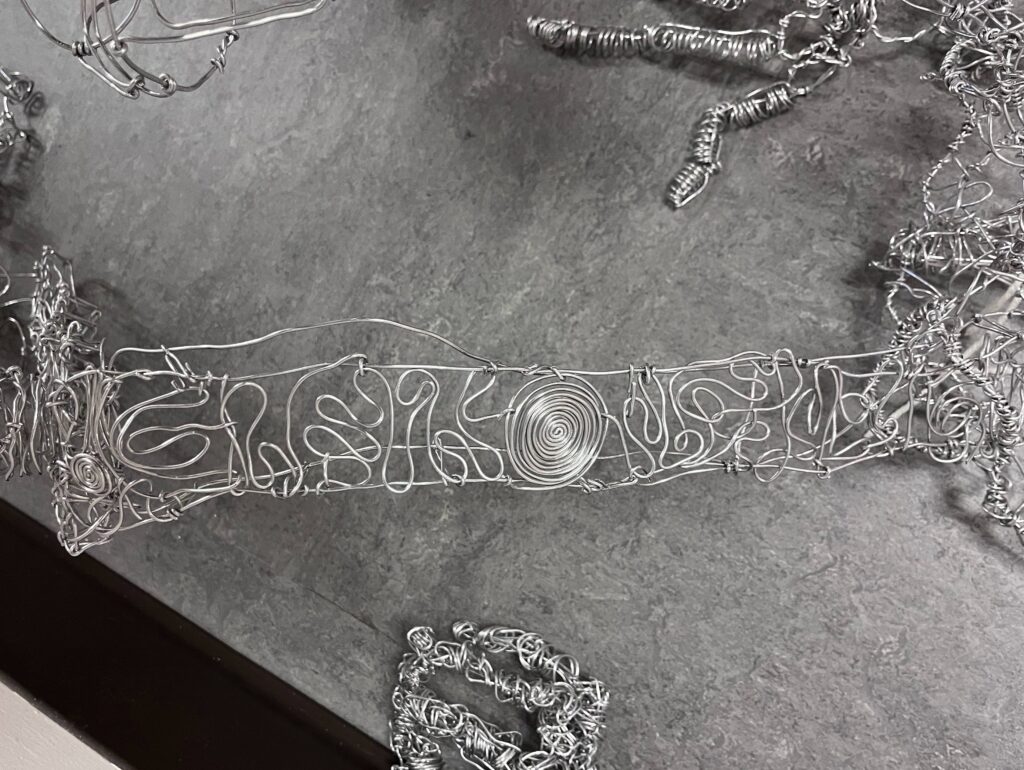
Finally this leg! Its so unlike the rest. The lines within the structure are so decorative, the look almost random but the pattern makes you realize that this is not the case. It looks like someone had a lot of fun with this. Again, a spiral in the centre of the bone is something different but still just very beautiful to the eye. It inspires me!


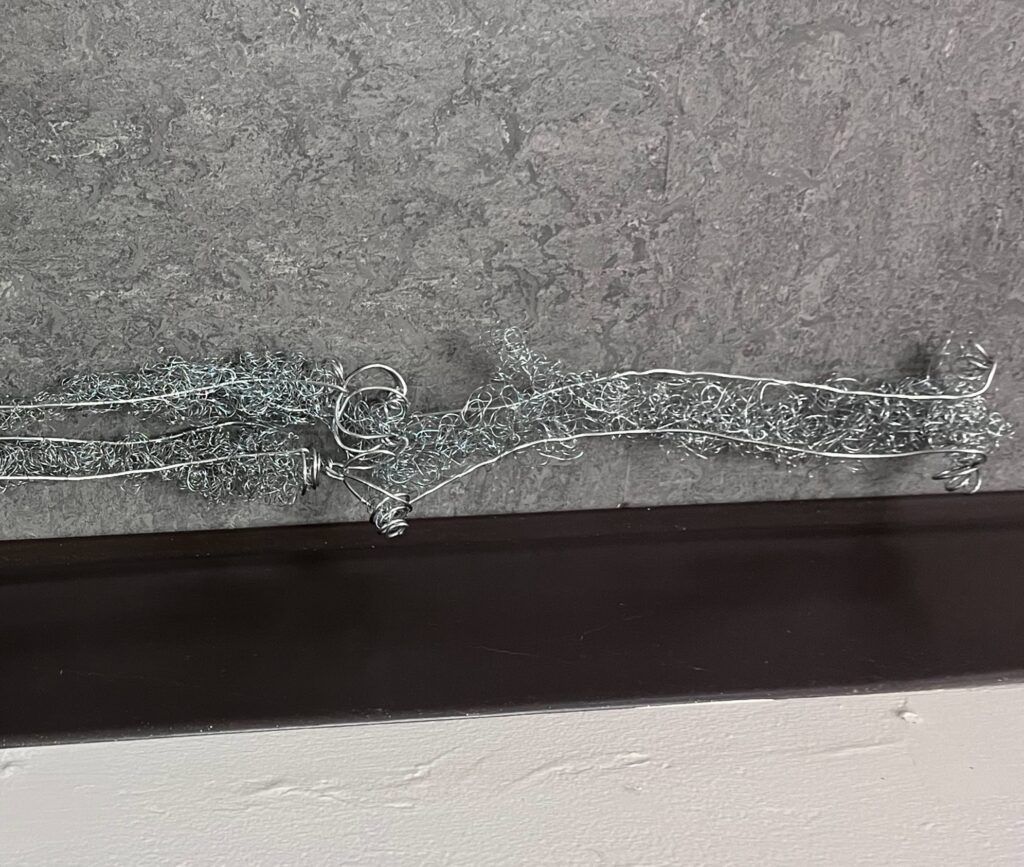
How did observing others’ work influence your own thinking: while creating my piece I saw this approach of creating smaller scrunched wire as the “filling” of the bone. It created a sense of volume that I emulated in my piece but with coloured wire on the inside of the heart. Next time I work with wire, I’d like to play more with the the wild, gesture-like wire above, and the spirally playful wires in the leg bone above.
Personal Creative Reflection
- Create:
- Learning Outcome: Integrate research and new ideas into your work.
- Prompt: How did research or inspiration from artists, designers, or movements shape your project? What ideas informed your creative decisions?
- Daniel Olivera’s work: I drew inspiration from Oliveira’s work by using smaller wire and colourful wire to incorporate more volume and to make elements stand out (heart against the wire skeleton). I also used the outline of of the heart like a 2-D drawing to both create structure and a more finished looking piece.
- Develop:
- Learning Outcome: Expand your skills by using new tools or techniques.
- Prompt: Did you experiment with new tools (e.g., software, hand tools)? How did learning these tools help you improve your project?
- With the first wire project I tried using smaller jewelry plyers and the larger pliers available in class. I preferred the smaller wires to help with creating the smaller life-sized project.
- I also explored resources on youtube on how to straighten the wire and creating loops for binding.
- In addition, examining the examples at the front of the class to see how shapes could come together with a spiraling effect while creating more line density to create emphasis on the form of the object.
- Expand:
- Learning Outcome: Take creative or technical risks.
- Prompt: Did you try something unfamiliar or experimental? How did taking this risk impact the final outcome?
- With the wire heart, I decided to take a risk by creating my entire project with spirals. This was effective in creating a sense of volume, but was difficult to create a solid structure that held together. It required layering of spirals and taking separate pieces together to create the overall shape, since I wasn’t able to effectively make one large spiral object with one piece of wire. There was a moment where I asked myself “is this going to work” but instead of starting over, I looked for technical solutions and was able to bind the shape together with linages and a larger outline of the of the entire shape – holding it all together.
- Problem-Solve:
- Learning Outcome: Identify challenges and find creative solutions.
- Prompt: What challenges did you face, and how did you overcome them? Were there any problem-solving strategies that worked particularly well?
- This was my first time working with wire and the 18 gauge steel wire was difficult to work with. As I communicated in my process blog, my largest obstacle was my mental approach to the project. The ah-ha moment was when I realized the purpose of the project was really to creative problem solve, to be curious and exploratory, not necessarily create a perfect 3D sculpture. This allowed me to be more forgiving for myself, and instead of focus my energy on criticizing myself or the project assignment, I could direct my efforts on finding solutions. This feels like an invaluable lesson I hope to continue to bring to my other projects throughout the Art Diploma program.
- Collaborate & Reflect:
- Learning Outcome: Use research, feedback and self-reflection to improve your work.
- Prompt: How did research, feedback, and your own self-reflection lead to revisions?
What specific changes did you make to improve your project?- Feedback in the class with the movement created by the spiral, from the first project was incorporated into the heart in the second project using spiral shapes to create sense of volume, bounce, and pleasing to the eye. This discovery in the first project, and encouragement from the class on this element, highly influenced my second piece.
- Communicate:
- Learning Outcome: Identify and reflect on connections made in your work.
- Prompt: As you worked on your project, what connections did you make between ideas, techniques, or materials? Did new approaches or unexpected relationships emerge as your project evolved? How did these connections influence your creative process?
- Yes! Binding one object to the other using small circular bindings and then twisting them to tighten could be applied to both wire structures. In addition, when observing the 18 gauge wire project from previous classes I took inspiration on the spiral bindings to creating the spiralled wire outline used in my heart